How to work with BankPilot
Here is everything the app can do, step by step, with screenshots of the real screens.
The screenshots come from the demo, which you can open without an account. Follow along while you read.
Overview: the three steps
The app is laid out as three steps. You can switch between them at any time.
- Connect a bank: you link one or more accounts through PSD2 open banking.
- Create rules: you describe which recurring payments should be watched.
- Monitor and notify: BankPilot checks whether those payments arrive, and emails you when one does not.
Create a rule
A rule covers one recurring payment: who it involves, how much you expect and how often.
- Open step 2, Create rules.
- Click New rule. The form opens.
- Name: a title you will recognise later, for example Rent flat 1.
- Search term: a piece of text that appears in the counterparty or the reference. Upper and lower case do not matter.
- Then set the category, the expected amount, the tolerance in percent, and the rhythm from daily to every two years.
- Optionally a start and an end date, so the rule only counts payments inside that window. Save closes the form.
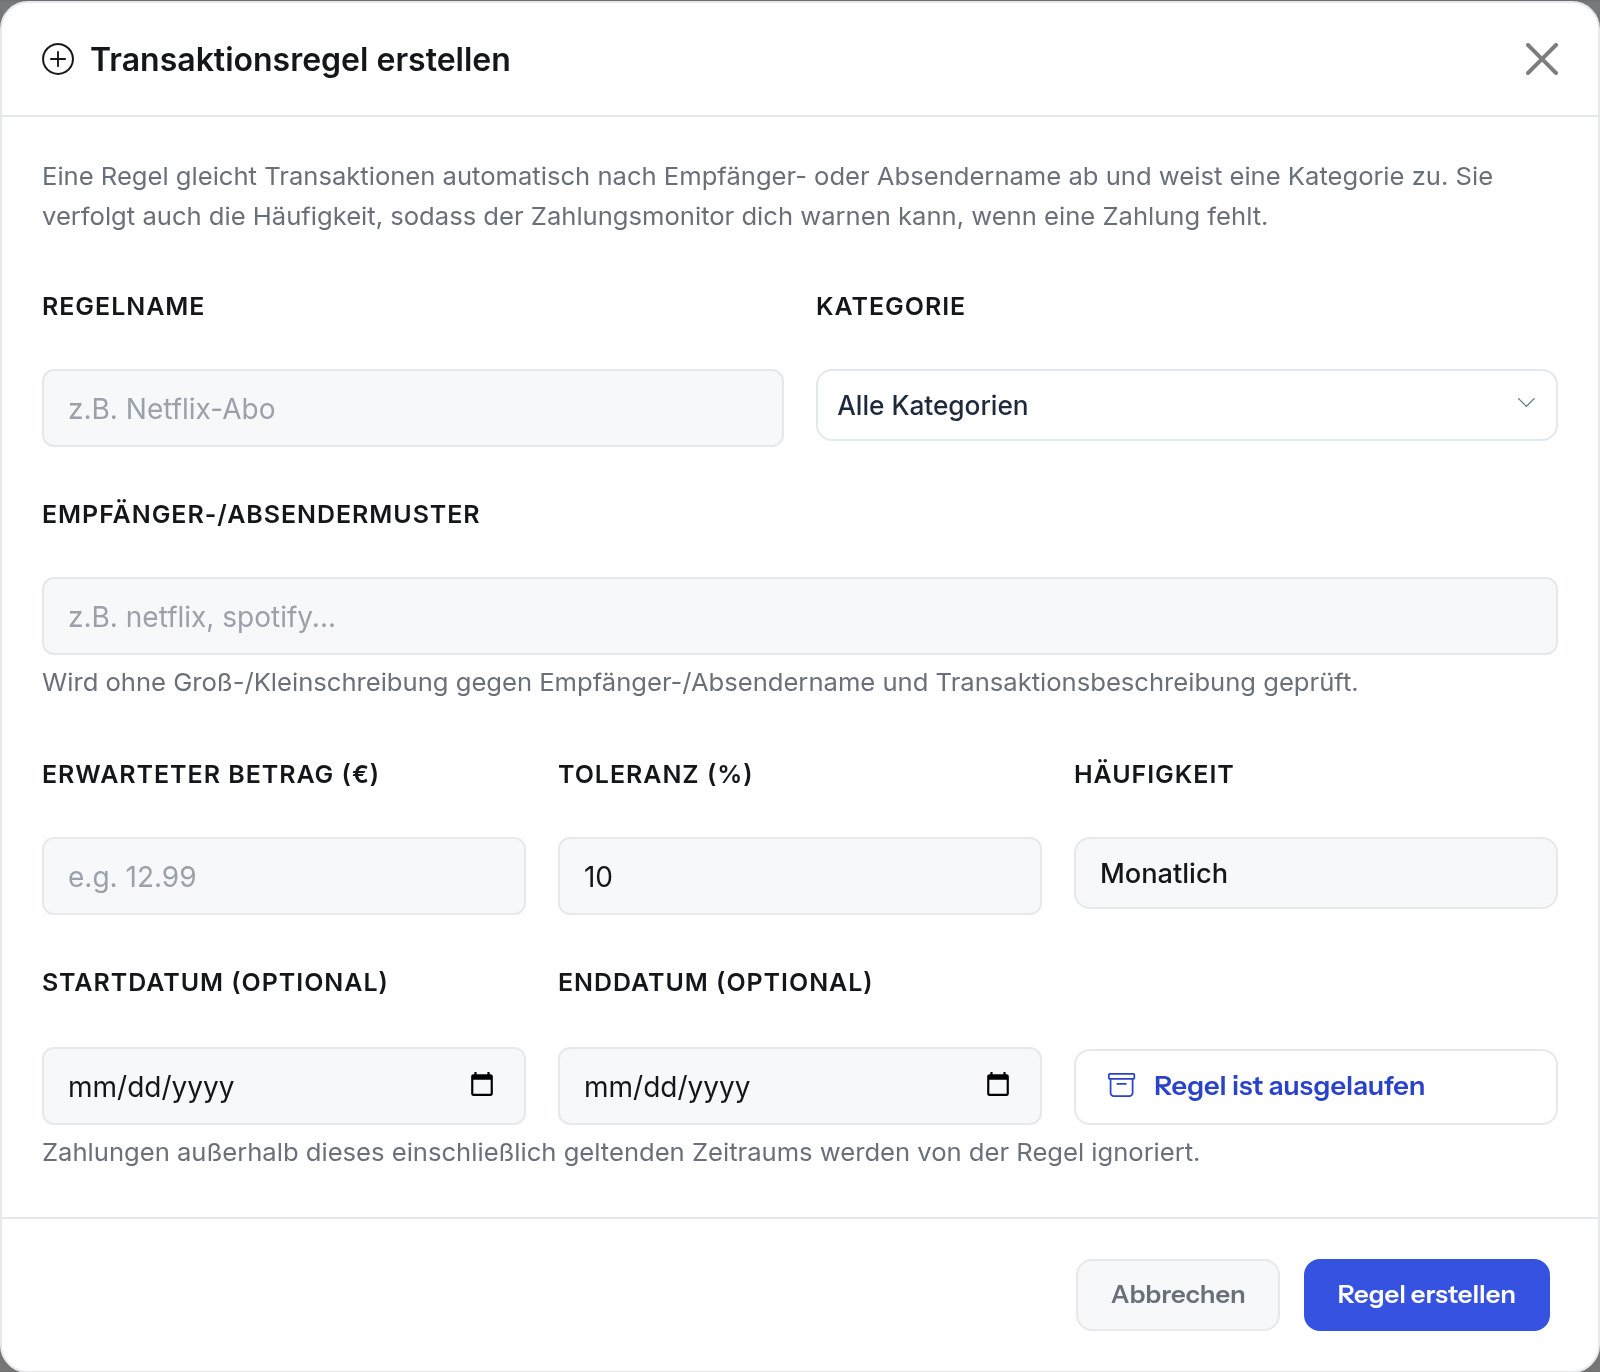
The search term is a plain piece of text. A short, distinctive one matches most reliably.
Edit, expire, archive and delete a rule
Every rule in the list has two buttons. The rest is in the form and in the archive.
- The pencil opens the same form as when creating, filled with the saved values.
- To expire a rule, enter an end date in the form, or click Rule is expired, which sets it to today. From that day it counts no new payments and is marked Expired.
- The archive button takes the rule out of monitoring. If it has no end date, today is filled in.
- You find archived rules under Archived rules below the list, where you can restore them.
- You can only delete a rule for good from the archive, using the bin icon.
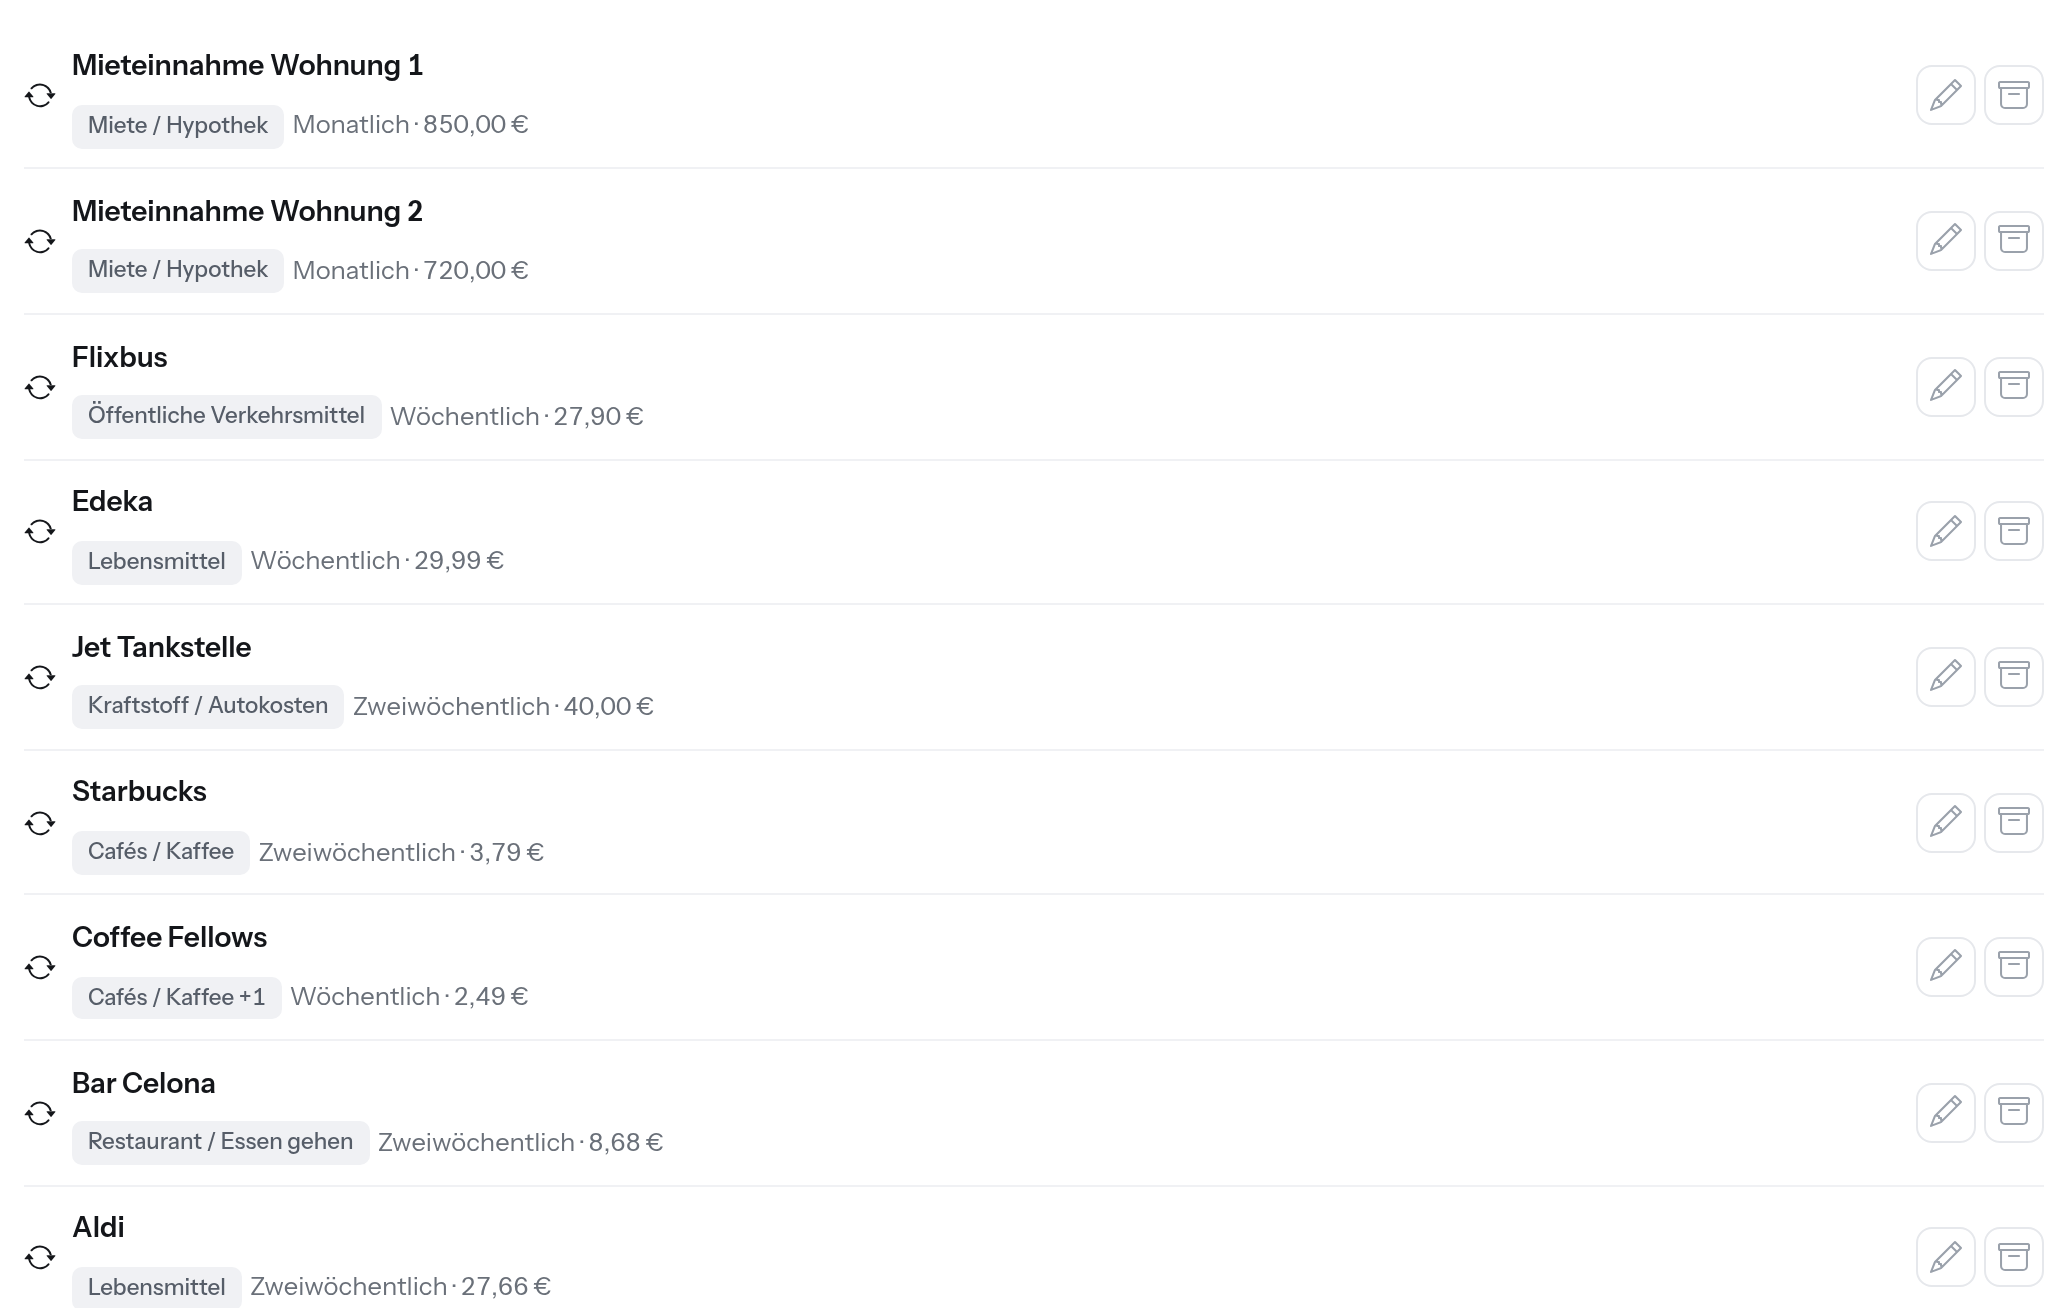
Deleting removes the rule only. The payments stay and keep their category, so a new rule can count them again.
See the payments behind a rule
For any rule you can show exactly the payments it counts.
- Open step 3, Monitor and notify.
- Click the row of a rule. The payment list below is filtered to that rule.
- Above the list you see Filtered by rule. Show all removes the filter again.
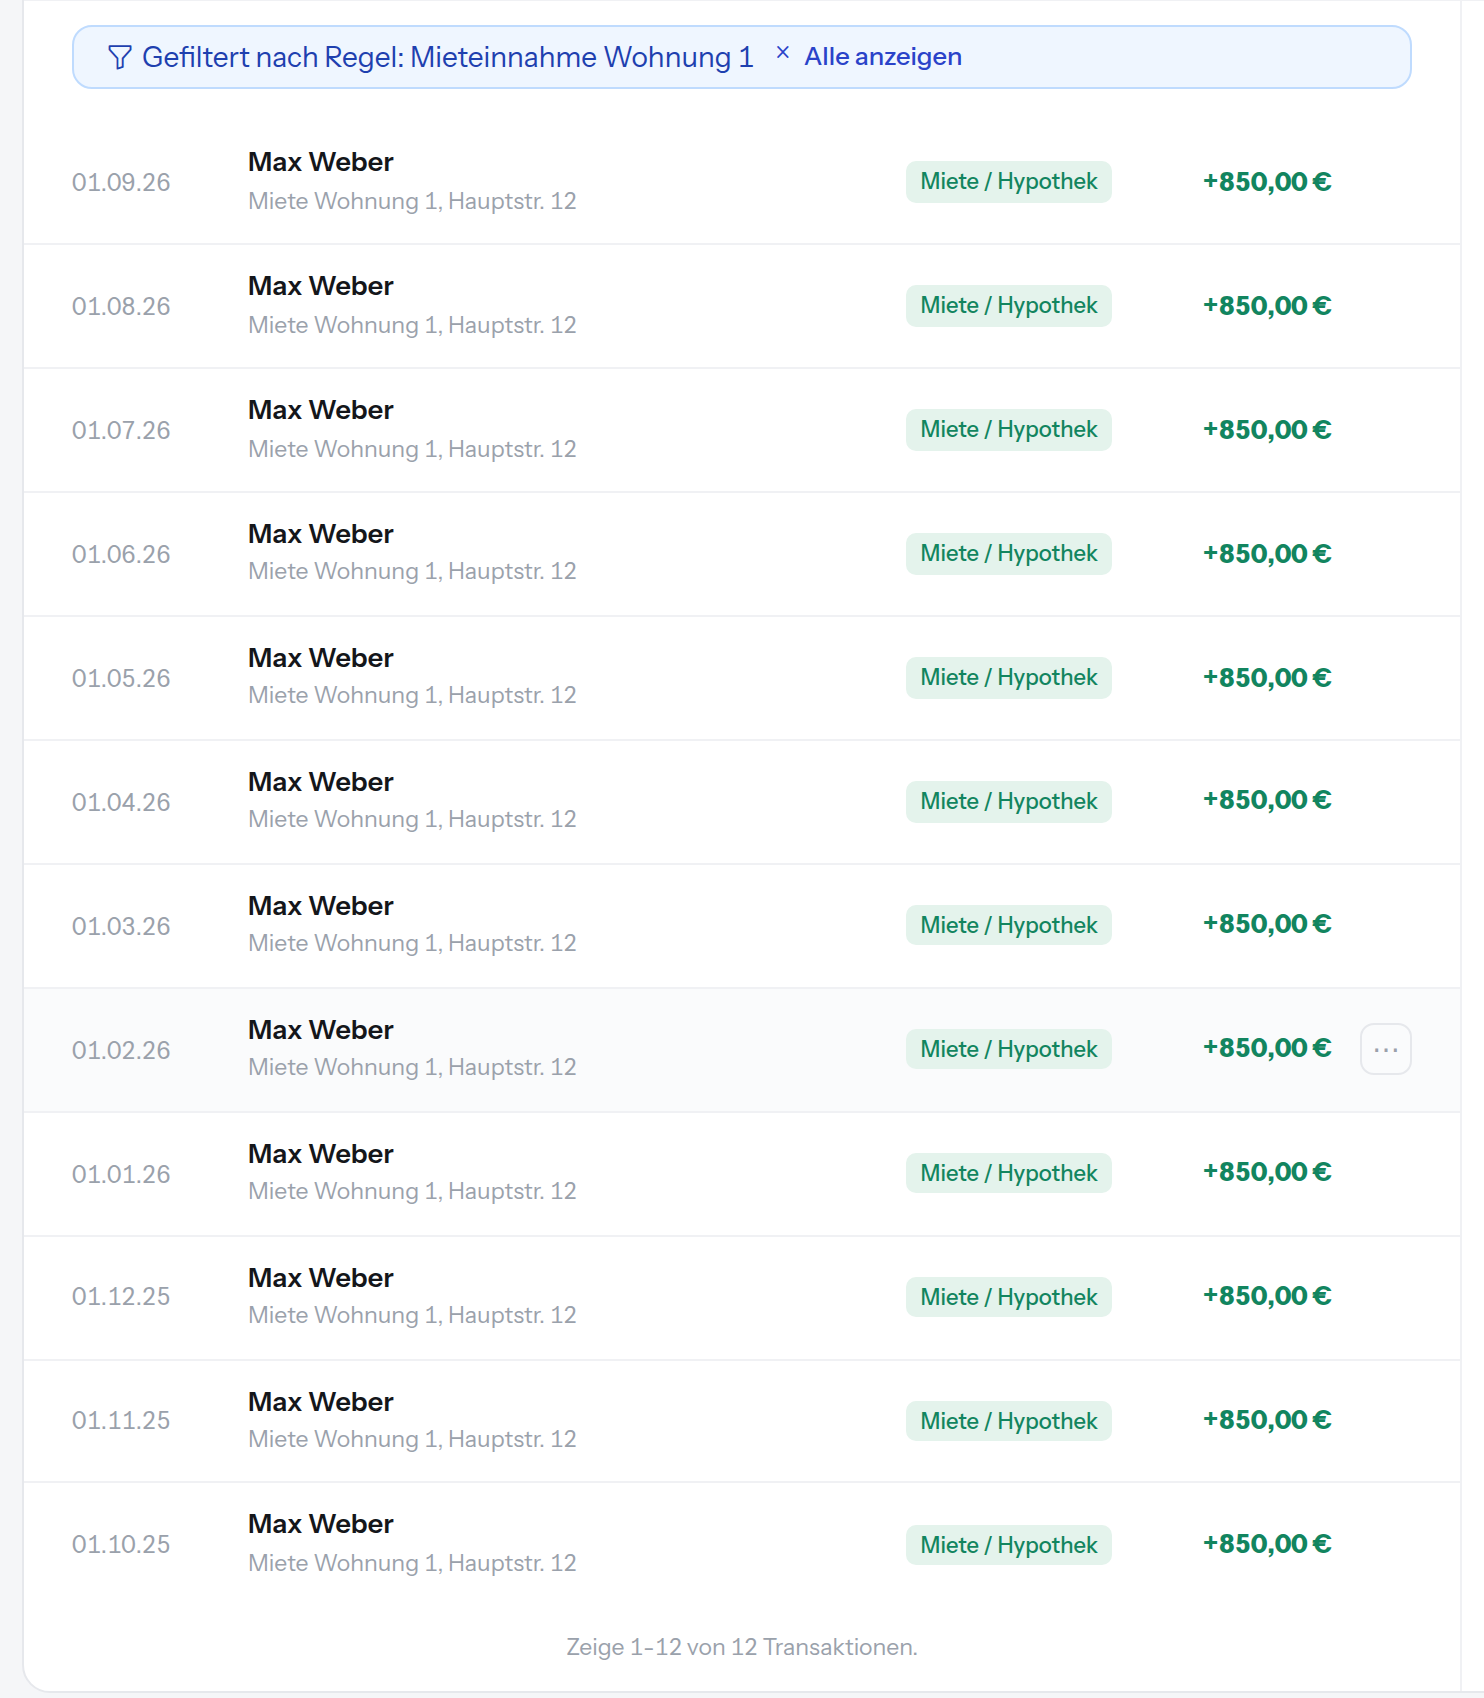
That is the quickest way to check a rule matches what you meant it to.
Add a single payment to a rule, or keep it out
Sometimes a rule catches a payment that does not belong, or misses one that does. You correct both on the payment itself.
- In the payment list, click the three dots at the right edge of a row.
- Add to rule assigns this payment to a rule of your choice, even one whose search term would never have found it.
- Exclude transaction from rules takes the payment out of the count. The row is then shown dimmed.
- You can undo both. The same menu then has Remove from rule and Allow transaction in rules again.
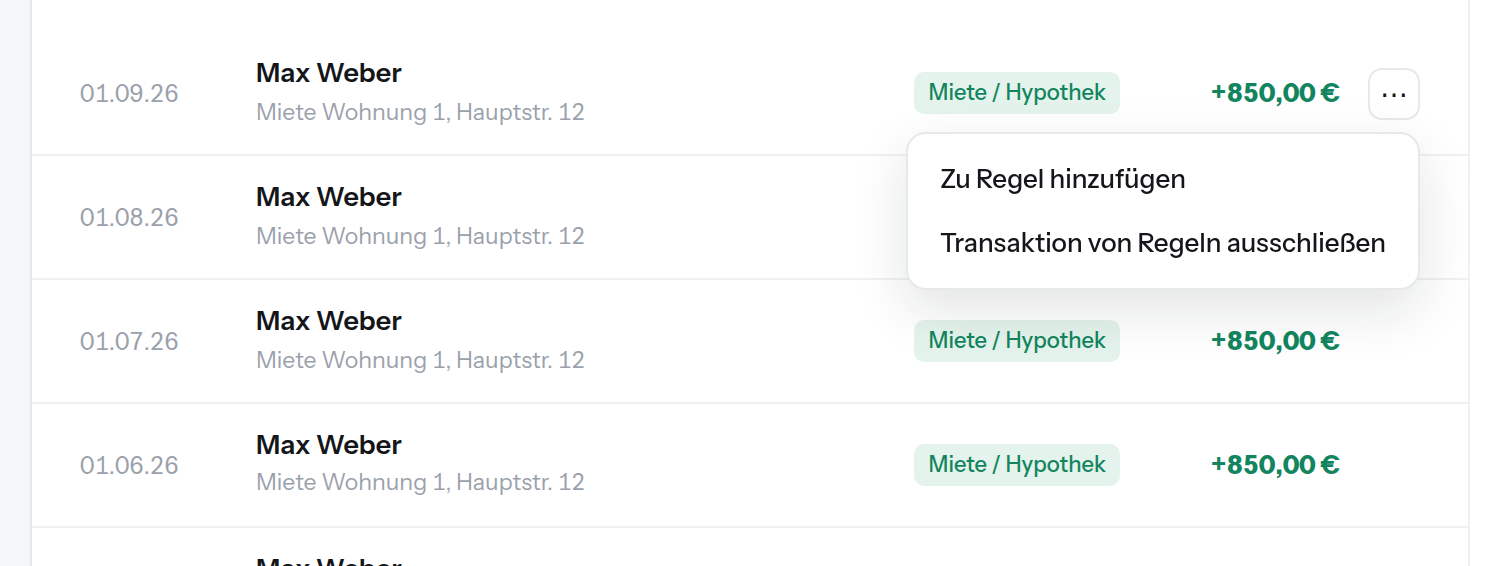
A payment you assigned by hand always counts, even if the rule's search term, amount or dates say otherwise.
Set and change categories
Every payment has a category. You can overwrite it at any time.
- In the payment list, click the category next to the amount.
- Pick the new category from the list.
- If similar payments exist, you get the option to change all of them at once.
- The Category filter above the list shows and hides individual categories. Uncategorised is one of them.
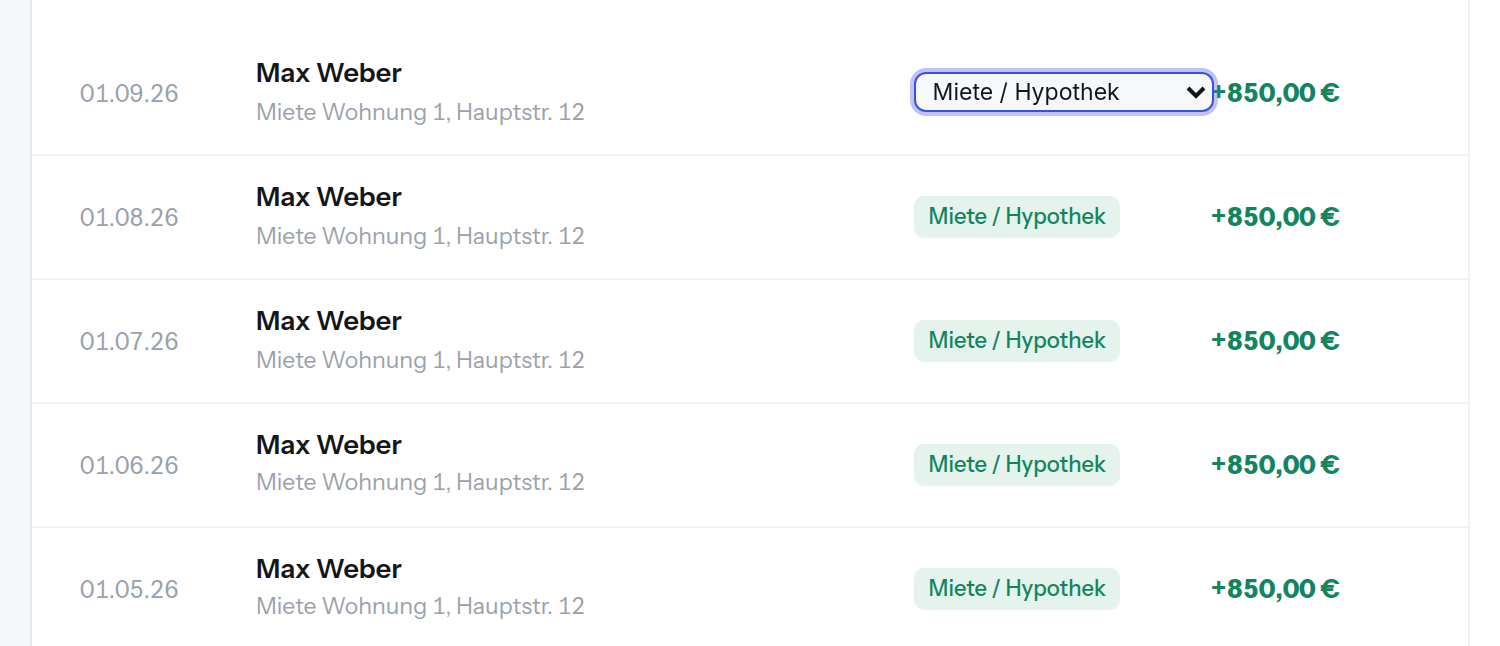
Categories are set automatically when payments come in. A rule also puts its own category on every payment it counts.
The payment monitor
The monitor shows whether everything arrived.
- At the top you choose the period the monitor calculates over.
- A rule without a warning has all its expected payments.
- Overdue means the last payment is further back than the rhythm allows.
- Missing means there is no matching payment in the chosen period at all.
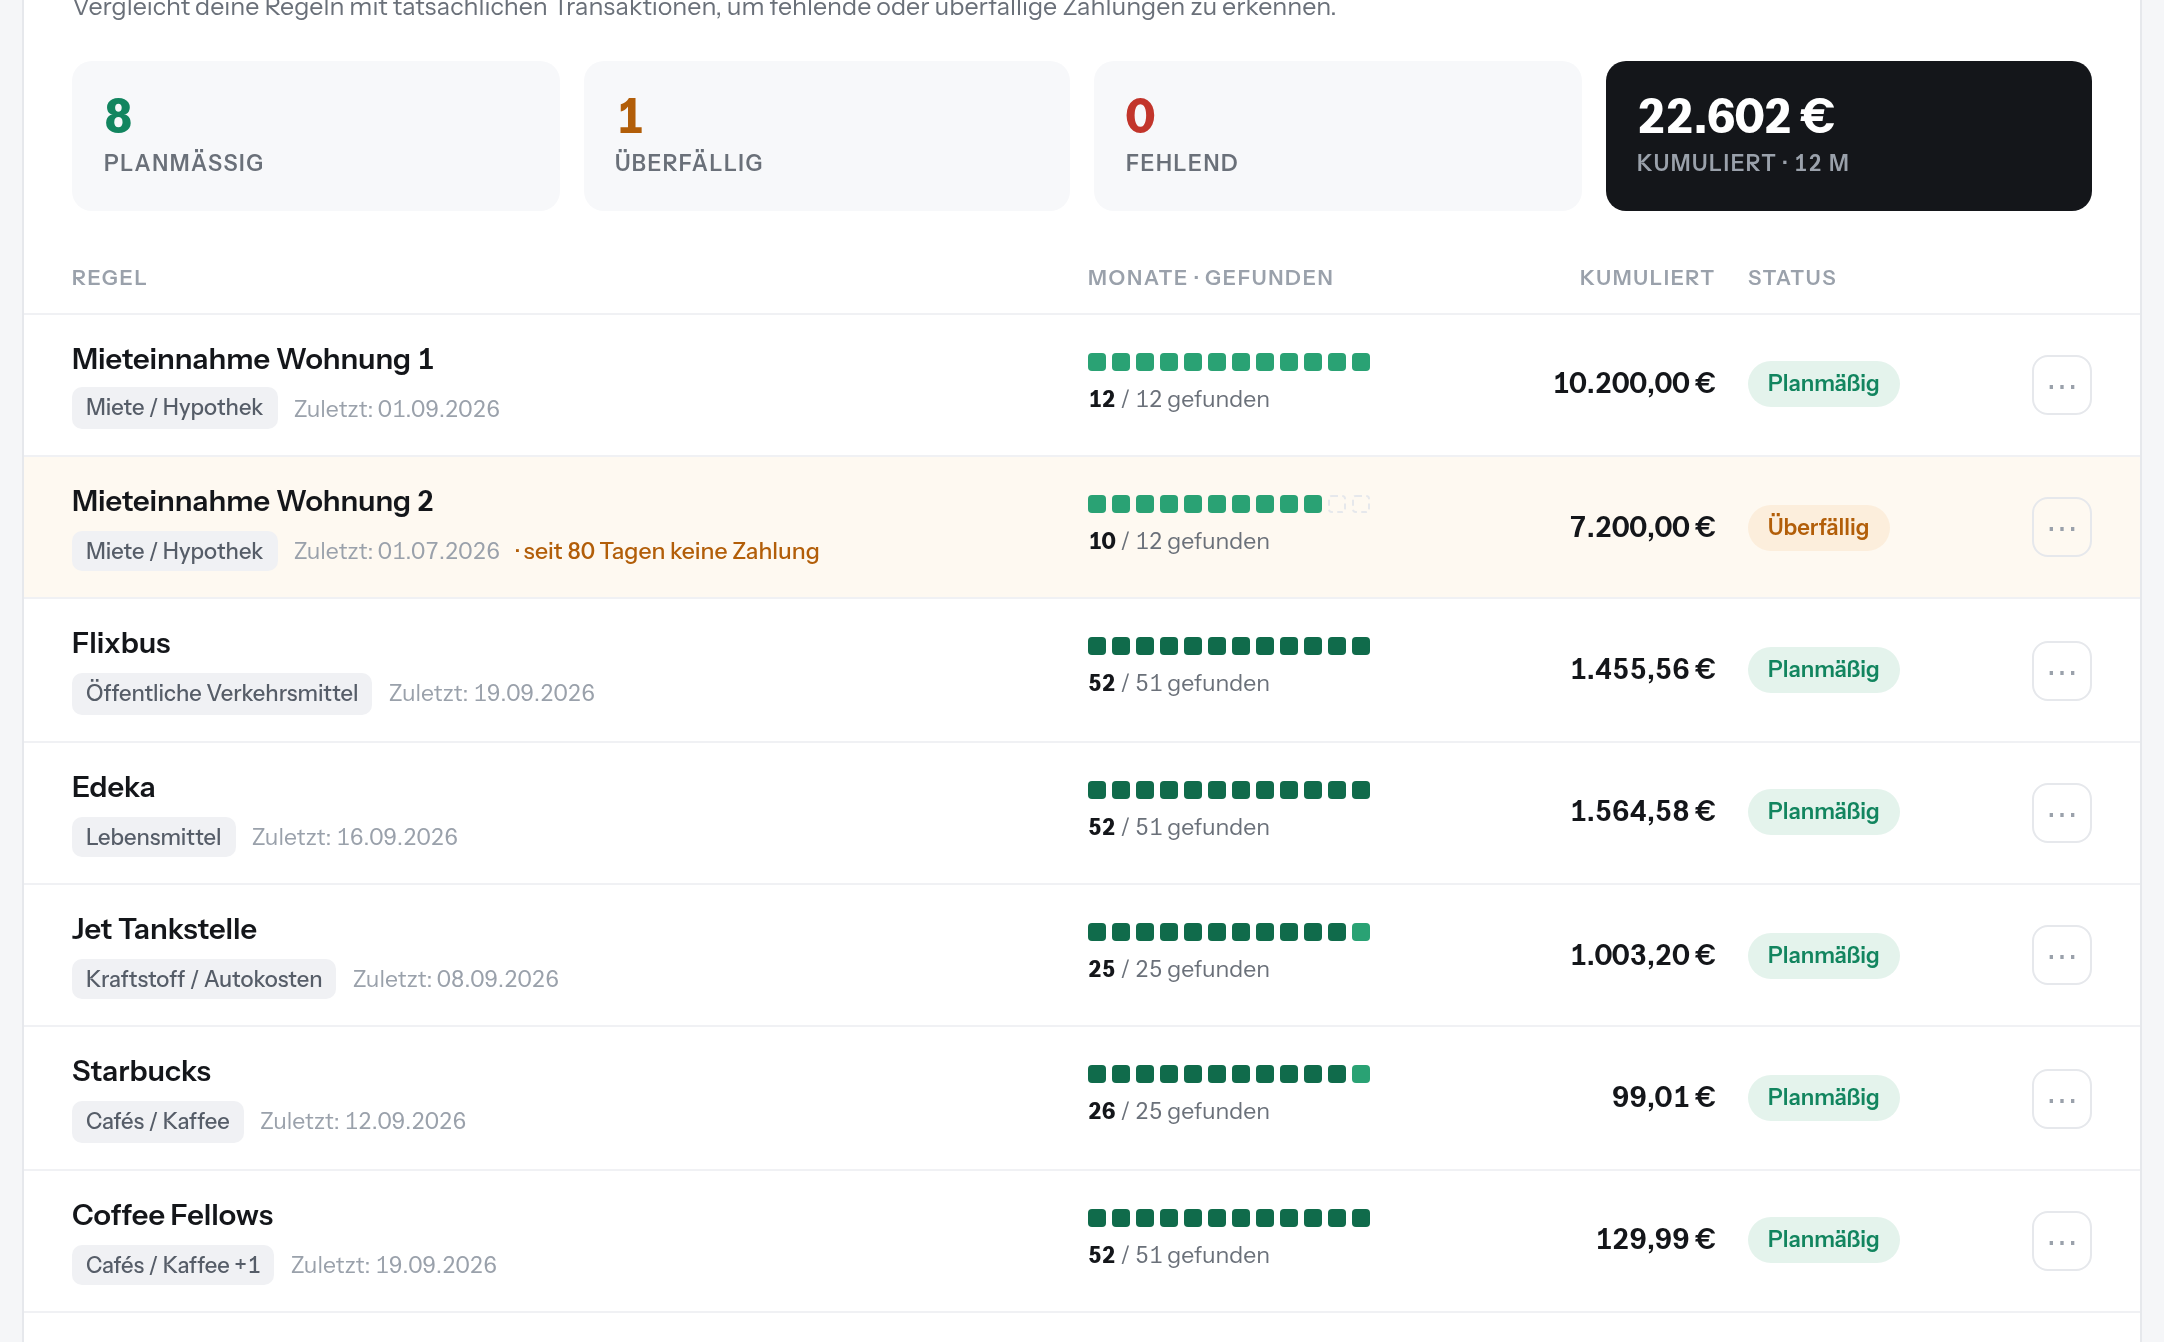
Amounts that differ from what you expected are listed separately, so you can see a price rise.
Set up notifications
BankPilot can email you about a late or missing payment without you opening the app.
- In Settings you set the email address the alerts go to.
- On the same page you set how often BankPilot syncs and checks.
- You enable push notifications per device. On iPhone and iPad, add BankPilot to the home screen first.
- In step 3 you can switch the emails off for individual rules.
Every notification email is also delivered as a push message to the devices you enabled.
Connect and manage bank accounts
You manage connections in step 1, one bank at a time.
- In step 1, use Add new bank account and pick your bank.
- You sign in at your own bank, through PSD2 open banking via Tink - A Visa Solution.
- A connection expires after a while, and BankPilot shows a warning with a link straight to the renewal.
- You can remove a single account or a whole connection. Both ask for confirmation first.
You type your bank login at your bank, not here. BankPilot never sees it.
AI assistant and what it may see
You can connect an assistant such as Claude or ChatGPT, and decide per account what it may read.
- You can read how to connect one on the AI assistant page.
- In Settings you decide per account whether an assistant may see it, for which period, and which payments stay out.
- Under Connected AI assistants you see every assistant you connected, and you can disconnect it there.
Every account is shared by default. Anything you change applies from the assistant's next question.
Still stuck?
The FAQ has the questions that come up most often. Or just try it in the app.